A properties box will pop up. At the bottom of the
properties box is a second box, labled "Help Sting--"
er, "Help String." :-) Click once at the top left part of the box.
Then click another time to "rename" (like in Windows)
that text. (See fig.2)

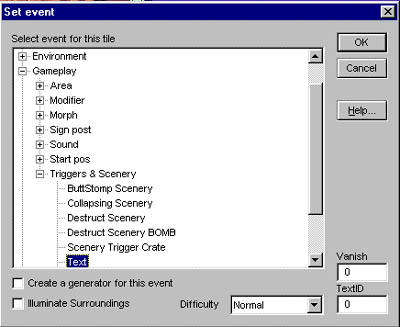
Now, inside the events menu select:
Gameplay - Triggers & Scenery - Text. (see fig.4)
Remember the number of your text? It was 0. Put a 0 in the "Text ID"
box, and leave a 0 in the "Vanish" box.
Placing a 1 in the Vanish box will make it so you can only read the
text the first time you touch it.
 (fig.4)
 (fig.1)
ALWAYS put an @ sign before you begin typing. This will work instead of pressing <Enter> to space your lines, and will place the text one line down; so it doesn't conflict with your score, and make your level look amatuer. (See fig.2)
To make colored text, put a # sign before the text in the help string.
I.e. "@Hahah this #rocks."
Once you've put the # sign in the help string, everything you type
after the # sign is colored in random colors.
Note the number of your text, you'll need to remember it. (See fig.2)
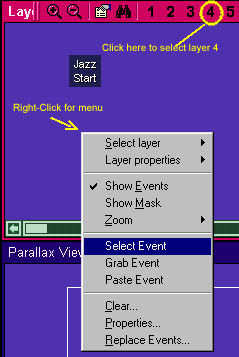
Now, you have your text! Next, you need to access it.
Make sure you're in layer 4, to insert events, then right-click to bring up a menu (see fig.3)
 (fig.3)